Getting Started
This guide walks you through your first steps with rq, using the Visual Studio Code extension to create and execute a simple HTTP request.
If you have not installed rq yet (CLI and/or VS Code extension), please start with the Installation section and come back here once everything is set up.
What You Will Do
In this quick tour you will:
- Create a new
.rqfile in a VS Code workspace. - Define a simple HTTP request using the rq language.
- Execute the request from the VS Code UI.
- Inspect the response in the integrated viewer.
The goal is not to explain every part of the language in depth, but to give you an intuitive feel for the workflow.
Creating Your First .rq File
- Open Visual Studio Code.
- Open or create a folder you want to use as your workspace.
- Inside that folder, create a new file named, for example,
getting-started.rq.
Once the rq extension is installed and active, VS Code should automatically:
- Recognize the
.rqfile type. - Enable syntax highlighting for rq.
- Show rq-specific commands in the Command Palette and/or a dedicated view.
Writing a Simple Request
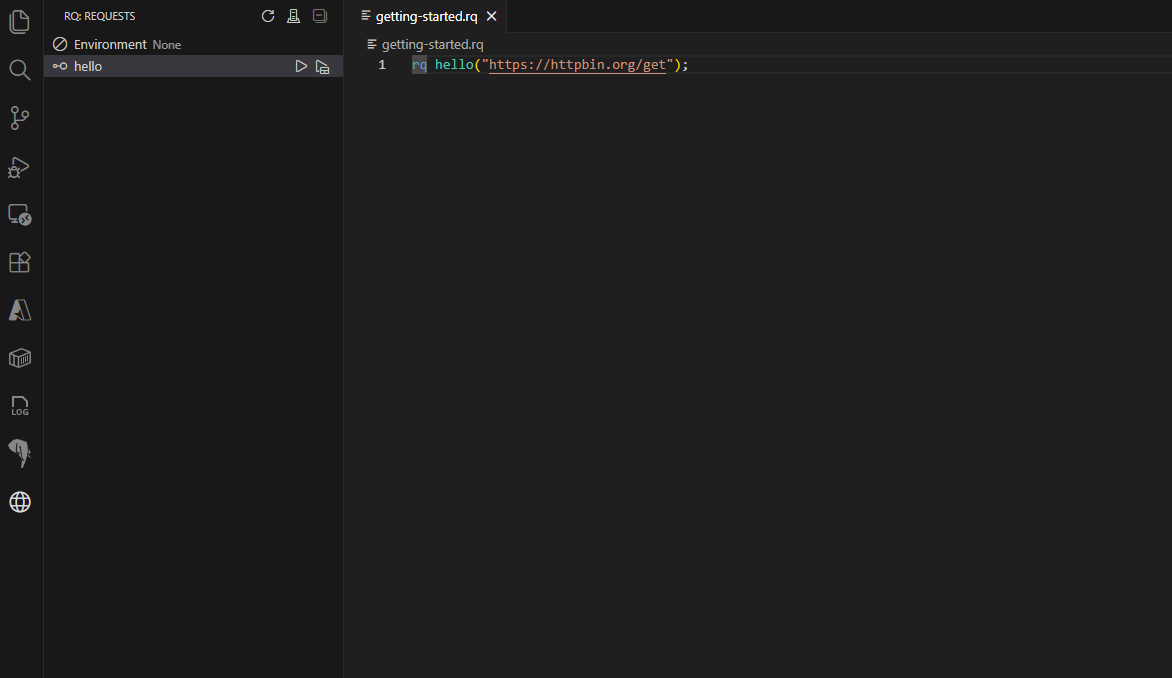
Paste the following minimal example into your new getting-started.rq file:
rq hello("https://httpbin.org/get");
This defines a single HTTP GET request named hello that targets https://httpbin.org/get.
Conceptually:
rq hello(...)declares a request calledhello.- The string inside the parentheses is the URL to call.
Later sections (see Language Definition) will cover how to add headers, bodies, variables, and more advanced features. For now, we focus on running this simple request from the UI.
Executing the Request from VS Code
- Make sure you have saved your
getting-started.rqfile. - Open the rq Request Explorer view (for example, from the Activity Bar or the View menu in VS Code).
- If the explorer was already open before you saved the file, click the Refresh button to reload the list of requests.
- Locate the
hellorequest in the explorer. - Click the Run button (or play icon) next to
hello.
When you run the hello request from the explorer, the extension will:
- Parse the
.rqfile. - Resolve the
hellorequest definition. - Execute the corresponding HTTP call.
If everything works correctly, you should see the response displayed in VS Code.
Inspecting the Response
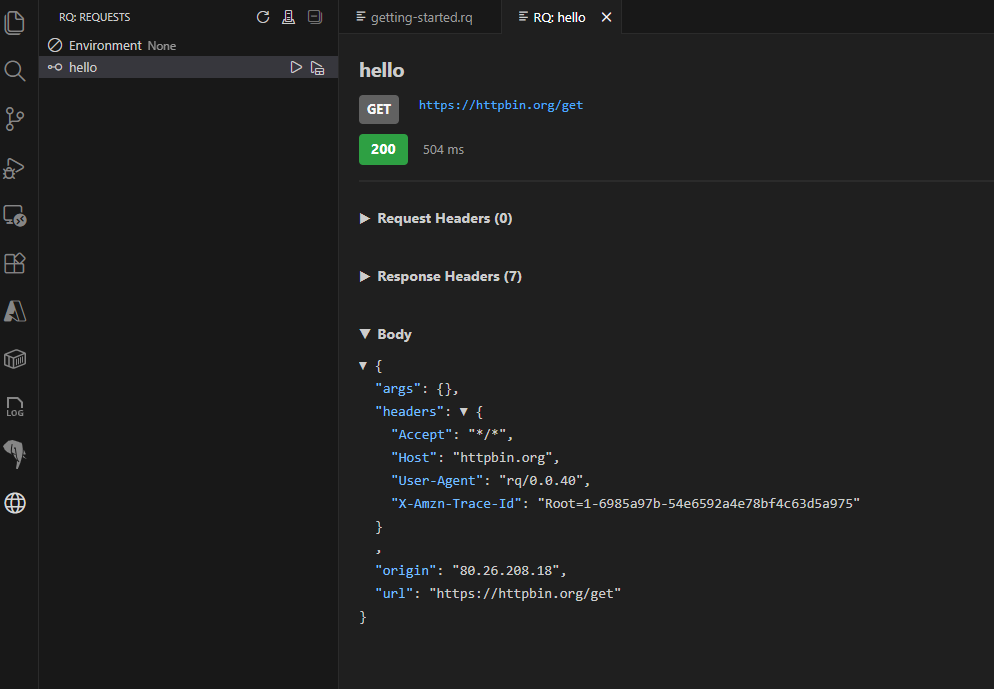
The extension provides a response viewer that typically includes:
- Status line (HTTP status code and reason phrase).
- Response time (how long the request took to complete).
- Request headers.
- Response headers.
- Response body, optionally formatted (e.g., as JSON) for easier reading.
For the https://httpbin.org/get example, you should see a JSON body that echoes information about your request (query parameters, headers, etc.). This is a convenient endpoint for experimenting while you learn rq.
Take a moment to:
- Scroll through the response body.
- Observe how the viewer renders JSON.
- Optionally, re-run the request to see that the behavior is repeatable.
Next Steps
From here, you can continue in several directions:
- Learn more about the rq language itself in Language Definition.
- Explore additional VS Code features (request explorer, environment handling, etc.) in VS Code Extension.
- If you prefer the terminal, try running the same
.rqfile with the CLI as described in CLI.
As rq is in preview, details of the UI or commands may evolve, but the overall workflow—define requests in .rq files and run them either from VS Code or the CLI—will remain the core experience.